Thursday, September 25, 2014

Veggie White Chili with Poblanos


I love fall. It's no secret in my family that October and November are my two favorite months. I love the crisp, cool air. I love running in that cool air early in the morning. The leaves, especially sugar maple leaves! I love fall clothes so, so much. Boots. Sweaters. Why does it seem like fall doesn't last as long as it used to?

Something else I love about fall is making soup. Sunday afternoons are my time to prep soups, stews and chilis that can simmer for hours and make excellent leftovers and freeze well. We are pescetarian (we don't eat meat but we do occasionally eat fish) and I rarely use my crock pot because I just haven't found a lot of slow cooker recipes that are vegetarian. I stumbled upon this recipe recently that is veggie and I had to try it.

This Veggie White Chili with Poblanos may sound spicy, but it's really not unless you leave the seeds on the peppers. To cut down on prep time, I stock up on frozen bags of mirepoix (carrots, celery and onion mix) and Cajun mirepoix (green pepper, celery and onion mix).  

I was a little nervous about roasting the poblano peppers, but it turned out to be really simple. Here goes:

Veggie White Chili with Poblanos
Adapted from Potluck at Oh My Veggies
  • 2 medium poblano peppers
  • 1 frozen bag of Cajun mirepoix
  • 2 cloves garlic, minced
  • 2 teaspoons ground cumin
  • 1 teaspoon dried oregano
  • ¼ teaspoon smoked paprika (I used regular paprika)
  • ¼ teaspoon ground cloves
  • 1 teaspoon sea salt
  • 4 cups low-sodium vegetable broth
  • 2 15-ounce cans cannellini beans, drained
  • ¾ cup uncooked quinoa, rinsed under cold water and drained
  • Garnishes: Cholula hot sauce, sour cream, mexican cheese


Instructions:
Photo courtesy of Potluck at Oh My Veggies
  1. First, roast your poblanos. Turn the oven on to the high broil setting and move the rack to about one-third of the way from the top of the oven. Wash and dry whole peppers and place on a sheet of aluminum foil on a cookie sheet. Place in the oven and broil until all sides are blackened. I suggest not walking away! All ovens are different but this may only take a few minutes.
  2. Remove peppers from the oven and carefully tent the foil over them to trap the heat and make the peppers sweat, which makes the skin peel easily.
  3. While the poblanos are cooling, heat the olive oil in a saute pan over medium heat and add the frozen Cajun mirepoix veggies. Cook for a few minutes until the veggies are warm throughout and softened.
  4. Add the garlic, oregano, cumin, smoked paprika, cloves, and salt. Cook, stirring, for one minute.
  5. Add a cup or so of broth and stir to make sure all the bits of flavor are scraped up into the broth. Carefully pour into the slow cooker along with the remaining vegetable broth, cannellini beans and quinoa.
  6. Carefully peel the skin off of the poblanos and remove the stem. Remove the seeds for a milder chili; keep them for a hotter chili. Finely dice and add to the Crock Pot. Stir gently to mix all of the ingredients together.
  7. Cook on high for 3 - 4 hours until the quinoa is tender and the chili is relatively thick. Taste and add additional salt and pepper to taste.
  8. Scoop into bowls and garnish with additional toppings if desired.
I never know what to expect with the number of servings. We are all hearty eaters and something that is supposed to feed 6-8 often doesn't in my house! This chili went a long way so I would say it yielded at least 6-8 servings and thanks to all the quinoa and beans, it's very filling. 

Do you have soup, stew or chili recipes to share? Anything that could be converted to veggie? I need some inspiration!  Enjoy!

Tuesday, May 27, 2014

Waiting is the Hardest Part

It has been a long while since I've posted an update about our house project.  Without going into too much detail, I'll just say it has gone over budget, long past the scheduled completion date, and we are way over it and ready to put the stress behind us and, finally, move into our home. No large project is without stress, but we have learned a lot through this process and I think have some valuable takeaways we'll apply to any future projects.  We have renovated two houses previously, but this is by far the most extensive project we've had.  

We are within weeks of moving in, and I'm working on putting together some before and after photos of the house.  I'll share just a few photos here for now, all taken about two weeks ago.  Since these were taken, cabinets have been installed, tile work has been completed and painting is underway. More pics to come soon.

Exterior of Addition - the brick on the original house was impossible to match, so we elected to install durable hardy board siding painted to match rather than using a different type of brick.

Master Bedroom

Master Bedroom
Master Bedroom
Bonus Room

Bonus Room

Looking into dining/sitting area from bonus room.  The new back entry way/mud room is to the left and the new powder room is to the right.

Looking out into the living room and the front window from the dining room

Kitchen

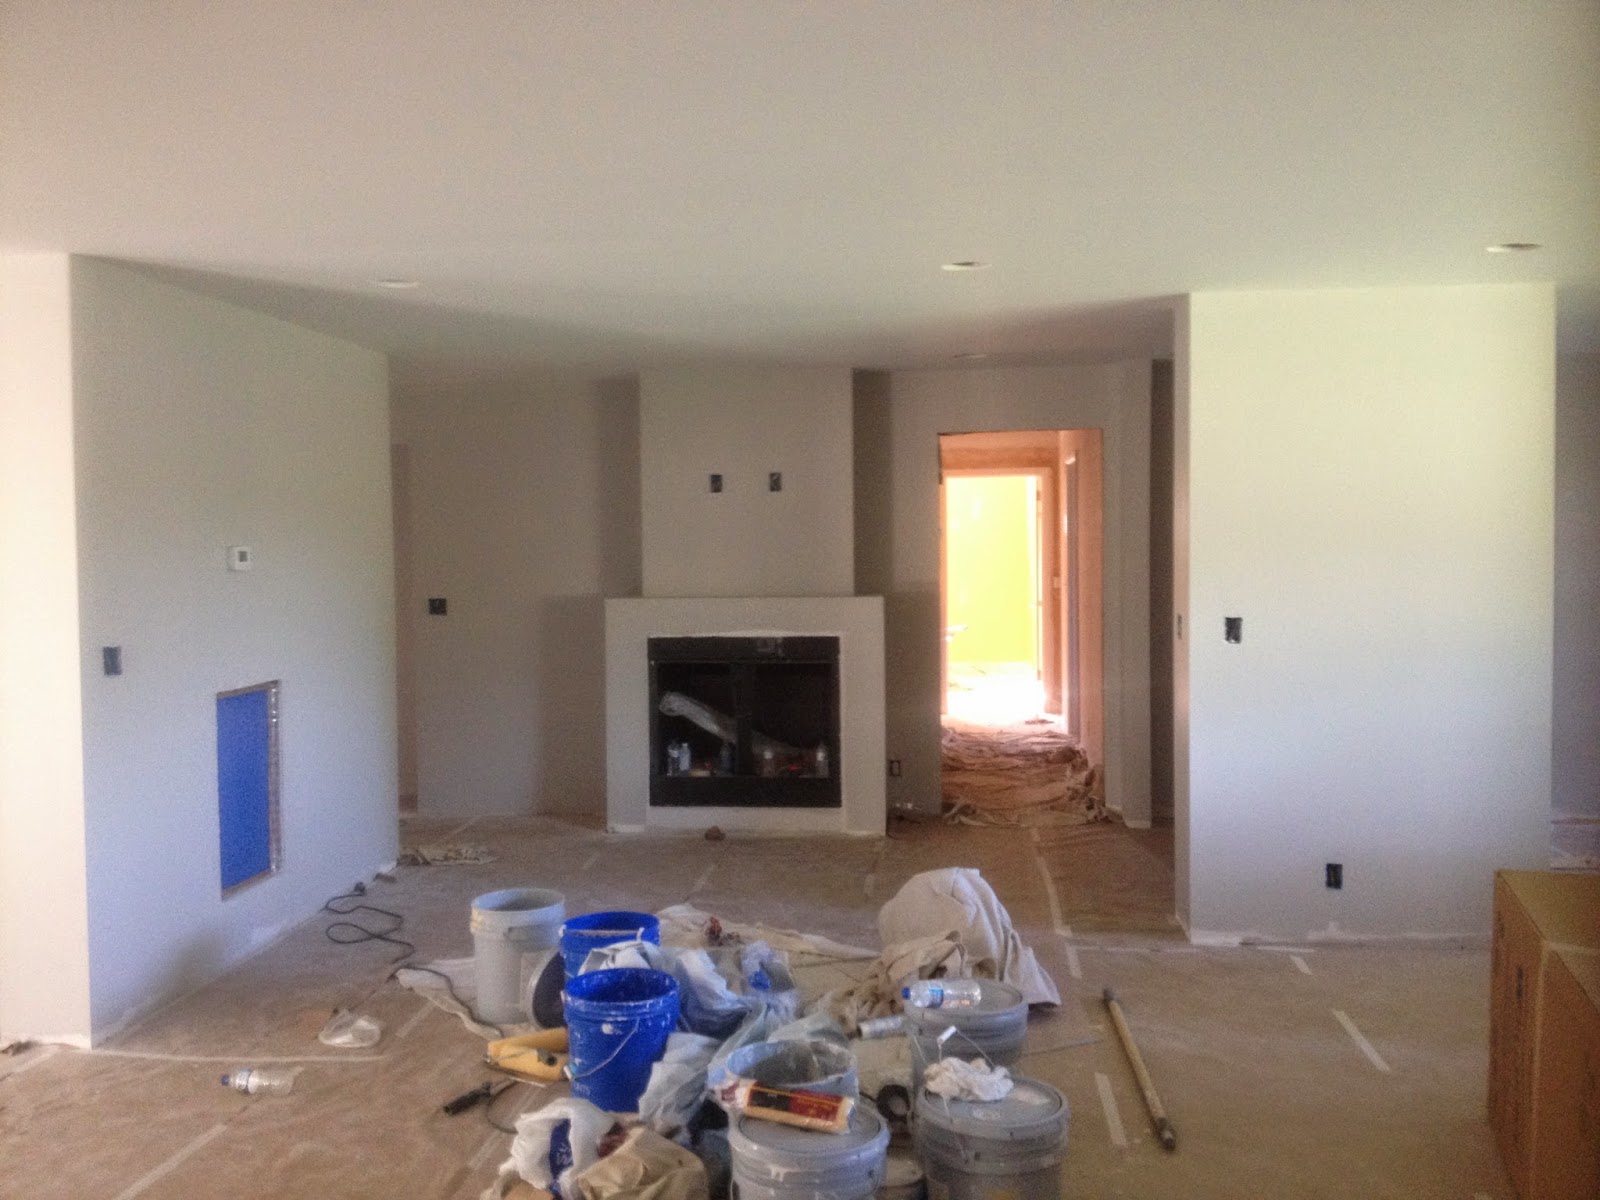
Dining Room and Sitting Area / Fireplace.  The doorway to the right leads to the original bedrooms and bathrooms.

Living Room and Cabinets (lots of cabinets)

Computer closet

Hallway to new laundry room and master suite
 
Master Bathtub

Master Shower

Master toilet closet

No more acoustic ceilings.  All original rooms in the house had acoustic ceilings and we had to apply 1/4" sheet rock over them because they had been applied with a glue that proved impossible to sand down to remove.
Cabinets!
Front door - surprise purchase Jason made. A solid walnut door with pretty side light panels.
 

Friday, April 18, 2014

Stitch Fix

I posted some photos of my first Stitch Fix box of goodies on Instagram and Facebook last month and it's time again for a new box to arrive!  I just got my shipping confirmation this morning, along with a referral credit.  Every time someone signs up with my referral code, I get a credit, which helps me sustain my healthy appetite for new clothes.  This is a shirt from last month's fix:


If you haven't signed up for a Stitch Fix yet, please think about trying it! The deal is, it's a $20 stylist fee for each Fix, but if you keep even one item in the Fix, you're credited back the $20.  If you keep all five items, you get the $20 credited back plus 25% off the entire order.  There's no shipping for receiving or returning items and you can leave as much or as little feedback about what you liked or didn't like as you want.  Also, you can receive fixes as often or seldom as you like. 


Here's my referral link: http://stitchfix.com/sign_up?referrer_id=3533882. 

Last month, I only kept one item of the five in the package, but I was tempted to keep three of the five.  I can't wait to see what's in this month's fix!

Time is Flying

I had every intention of writing two- and three-month posts for Hawkes, but that hasn't happened!  He was three months old this week and I have yet to slap that three month sticker on his chest and take a photo, but it will happen!  He is such a big guy now and really strong.  

Yep, I could look at this face all day! His eyes are not as blue now - they are a blueish/greenish/brownish hazel.

I love this face - it's his skeptical face.  He's starting to really enjoy his play mat, but he's apparently suspicious of some of the dangling toys.

My favorite face - the gummy smile! Hawkes is such a happy, smiling little guy. It makes the tired days a lot more fun after some sleepless nights.
Likes:  Sophie, jumping/putting weight on his legs, putting his entire hand in his mouth, drooling, Sophie, blowing bubbles, Sophie, foot rubs, On Top of Spaghetti, Sophie, Twinkle Twinkle, Sophie, being naked or having his diaper changed, Sophie, baths, and pretty much anything Sophie does (except maybe when she grabs and squeezes his head or pinches him - gah!)

Dislikes: Sleeping all night long.  Ha!  We were so spoiled by Sophie, who was sleeping 10 hour stretches at 9 weeks old.  Not so much with Hawkes, but I know we'll get there.  We had a crazy week last week as Houdini found ways to escape from virtually every supposedly inescapable swaddle contraption.  At this point I'm double swaddling him for naps in a Woombie underneath a velcro Summer Infant Swaddle (both of his are for "big baby"!) and at night with his arms swaddled in an Aden + Anais swaddle with a velcro Summer Infant Swaddle on top.  Crazy! While he likes to escape, he hates being unswaddled.  Go figure!


Last month, I spent the day with a wonderful young woman who helped me get Hawkes into a better routine during the day, including crib napping, and it was the best thing we could have done.  We struggled a lot last month with bottles.  We've been trying pumped bottles with him since he was about three weeks old, but he's never really taken to them and lately flat out refused them.  Knowing that I was returning to work soon and he was refusing them made me a little crazy.  We tried different techniques and bottles and finally found one, the Comotomo, that he's taking pretty well.  Fingers crossed!  

Sometimes it feels like the entire last month of maternity leave is spent preparing myself and my baby to have the leave end. I just want the transition to be as good as possible for both of us.  Just a little more than two weeks now!  He's in good hands at the same school Sophie has been in since she was an infant and even in the same room she was with awesome and loving teachers.  That makes it much easier!

Have a great weekend!

Tuesday, April 8, 2014

The Fun Stuff

If you've seen me in the last month, you've heard me say the house is behind schedule.  Shocking!  It will be amazing when it's finished, but I'd be lying if I said I wasn't frustrated and over it.  With that said, it's getting closer to being done and we're making some fun choices now with regard to the counter tops, tile, fixtures, etc.  We looked at a lot of options for our kitchen and bathroom - granite, quartz, marble.  We finally settled on Fantasy Brown quartzite for the kitchen and we're still trying to decide what to use in the master bath, but we've narrowed it down to a couple of quartz and marble selections.  The kitchen needs 94 square feet of counters, but the bathroom is only about 14 square feet.  We searched and searched and finally found a couple of fabricators that offer quartz and marble remnants and marble by the foot instead of by the slab, so that opened up our options a little more.  

Here's the Fantasy Brown quartzite:

We're doing a simple glass subway tile backsplash in a light gray, laid horizontally and a herringbone accent piece with the same tile over the cooktop.

In the master bath, we've selected the tile:
The stria 12x24 tile will be laid staggered on the floor, tub deck and vertically in the shower.  The hexagonal tile will be used as a tub backsplash, on the shower floor and in the recessed shampoo/soap cubbies in the shower.  We'll use a glass tile in that shade of blue shown in the subway tile - but the glass tiles we're using are 1x6 and we'll lay 6" of that tile about halfway up the shower to break up the larger tile and add some color and interest.  We want to keep the counters simple because there is a lot going on in the tile but we don't want to be to monochromatic.  I think we found something we like today, but we need to see it again to make sure. 

Here are a couple more pictures of the house from this past weekend.  This is just the kitchen - I'll share more from the other rooms and addition soon!

My new kitchen!  It's a horseshoe shape and will have a 5-foot square island in the center.


The view from the kitchen sink.  Not bad!


Thursday, March 13, 2014

Bathtub Find!

Jason and I are seriously frugal and we have learned a lot over the years about how to save money on renovation projects without sacrificing quality.  Since we purchased our first home in 2005, we've completely remodeled two homes and now this major renovation and addition makes our third.  We have three rental properties and one empty lot and when we did the previous remodels, we did so keeping in mind that tenants would ultimately live in the space and knowing that it would need to be versatile to a variety of tastes and easy to maintain.  This time, it's a little different because everything is being selected just for us.  We have a little more room to be creative and build and finish the home to our own tastes. 

One item that became important to me was finding a tub that would be big enough for either of us to enjoy using without feeling like a sardine stuffed in a can.  We're not little!  It became clear pretty quick that a five-foot tub wouldn't work, nor would a 36" wide tub.  We ended up modifying our master bath floor plan slightly - changing the pocket door to the toilet closet to a swinging door - to make room for a 42 x 72" whirlpool tub.  Tubs aren't cheap!  We searched high and low online, in big box stores and at one particular liquidation store that I refer to as "the place where dreams go to die."  

A friend recommended a plumbing supply company in Nashville, and we checked it out even though we were skeptical about getting a good value.  We were surprised to find out that a builder/contractor had ordered four very nice whirlpool tubs for a project and never picked them up, so we saved more than 66% on the tub we purchased.  This Jason tub (Jason is "son of Jacuzzi" - a brand started by a former Jacuzzi employee) is the one we selected.  


We keep learning new things throughout the process and this was one of my favorite bargains.  Now I know it doesn't hurt to ask about items on hand like this that can be purchased for a steal. 


Thursday, March 6, 2014

House Update

We've hit a point with the house where we're frustrated and ready to see things move along quicker, easier, and with fewer change orders! Overall, it's still an awesome process, but it is not without challenges.  We knew renovating and adding on to an older home would bring a fair number of unforeseen situations, but the number of them has been a little overwhelming at times. 

First, we had the fireplace, the floor joists, the sub flooring and the popcorn ceilings.  We removed the fireplace, replaced the sub flooring, added joists and we will be sheet rocking the ceilings in the existing house to cover the popcorn ceiling because it could not be removed by sanding.  

While the pipes were winterized, we ran into some serious leak issues when the temperatures thawed.  Twenty-two leaks to be exact.  We decided to replace all of the plumbing rather than repair the existing plumbing so going forward, we should be in good shape.

The latest challenge is too technical to get into too much detail here, but it involves the pitch of the roof.  We hired an architect to draw up the plans for our addition and renovation for many reasons; one of the foremost reasons was the importance to us of not having a roof line that jutted above the existing structure that would be visible from the street.  We had a near-miss with the construction of the roof over the last week but were able to work it out so that the pitch is as it should be.

Here are some of the latest pictures:
Part of the roof pitch problem-solving - we had to decide between 45" or 24" overhangs.  The 45" would have required additional support, so we're going with 24".
View of the kitchen from the living room.

Pantry - located within the kitchen on the end of the right side of the horseshoe layout


Hallway from the existing house to the master suite and laundry room - to the right of the new kitchen

Laundry Room

Linen closet in the new hallway to the master/laundry
Closet in the master bedroom

New master bath and toilet closet. It will have a separate whirpool tub, shower and water closet.
Master bedroom. The hardest to capture because I had limited camera sight lines.

More to come soon!